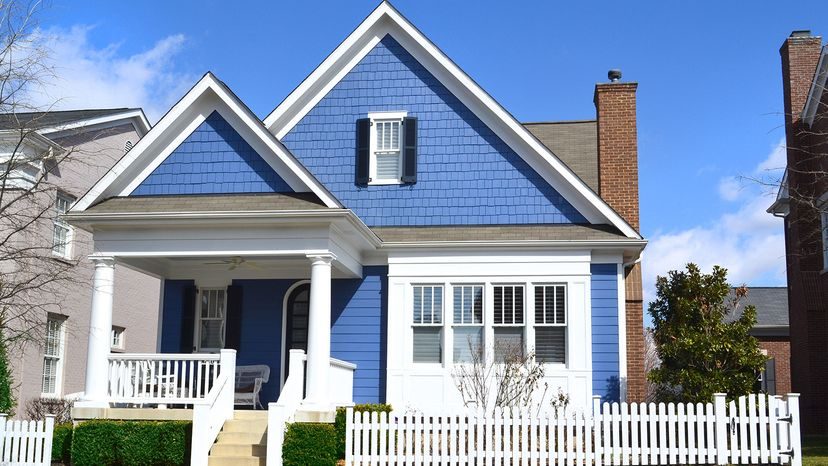
Not all houses are built the same. When you’re hunting for a home or just walking past a nice property, knowing the difference between a Victorian and a Ranch saves you time. It also helps you understand what you’re actually buying. House styles are more than just aesthetics. They reflect history. They show region. They signal personal taste from decades ago.
Understanding these styles is practical. It helps with renovation plans. It helps with maintenance. A roof pitch tells you about snow load. A foundation type tells you about soil conditions. Let’s look at the most common types of homes. Each has distinct features and charm.
1. Single-family Detached Homes
This is the baseline. The standard. The single-family detached home stands alone on its own lot. No shared walls. No neighbors touching your side. This separation offers privacy. It offers noise reduction. It offers freedom to modify the exterior without HOA headaches (usually).
Why Choose a Detached Home?
- Privacy: You control your space.
- Land: You get the yard. For gardening, pets, or just space.
- Resale Value: These are in high demand.
- Flexibility: Renovate the kitchen. Add a second story. Change the roof. It’s your call.
What to Look For
- Foundation: Slab, crawlspace, or basement? Each affects heating and plumbing access.
- Roof: Gable, hip, flat? Pitch matters for drainage and attic space.
- Materials: Brick, vinyl siding, wood shake? Each has different maintenance needs.
DIY Considerations
- Maintenance: You handle it all. Gutters. Landscaping. Repairs.
- Tools: You’ll need a ladder. A pressure washer. Basic hand tools.
- Safety: Always check for structural issues before starting big projects.
“A detached home gives you the freedom to make it yours, but it also means you’re solely responsible for keeping it standing.”
2. Shared Wall Living: Townhouses and Rowhouses
Next up. Townhouses. Rowhouses. These share walls with neighbors. They’re common in cities. And suburbs. They offer a middle ground between apartment living and full detachment.
Why Choose a Townhouse?
- Affordability: Often cheaper than a detached home.
- Location: Closer to urban centers.
- Community: Shared spaces. Closer neighbor interaction.
- Low Maintenance: Some HOAs handle exterior maintenance.
What to Look For
- Wall Thickness: Soundproofing is key. Ask about shared walls.
- Light: Do windows face a shared light well? Or the street?
- Parking: Is there a garage? Street parking? A driveway?
DIY Considerations
- Shared Walls: Be careful with drilling. You might hit a neighbor’s wall. Or their plumbing.
- Exterior Changes: Check HOA rules. You might not be allowed to paint your front door blue.
- Roof Access: Shared roof? Who fixes leaks?
Comparison: Detached vs. Townhouse
| Feature | Detached Home | Townhouse |
| :— | :— |
Why Ranch-Style Homes Dominate the Market
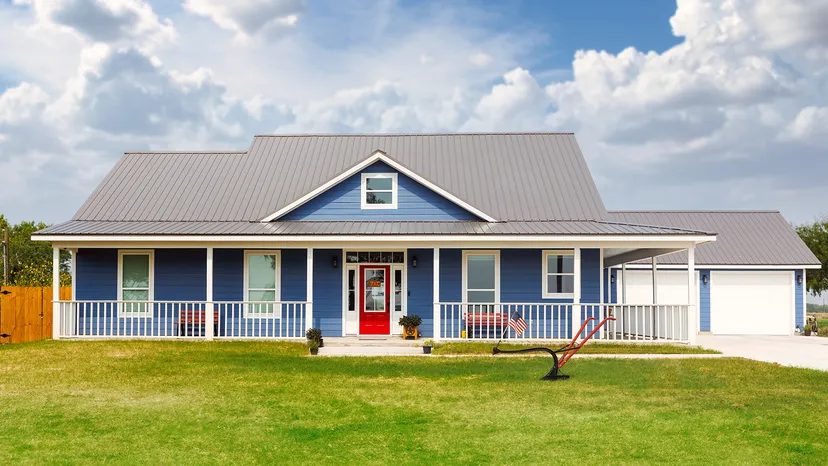
If you are looking for the definition of low-maintenance living, start with the ranch-style home. You will find these single-family residences scattered across every zip code from California to Connecticut. They sit on their own lots, detached from neighbors, which means no shared walls, no hallway noise, and a private entrance that feels like your own little kingdom.
These houses are the backbone of American suburban development. They offer a straightforward layout that appeals to families, retirees, and anyone who wants to avoid climbing stairs. While some ranches stretch across a single floor, others include a split-level design or a finished basement to add square footage without adding vertical complexity.
Key Features of Ranch-Style Properties
What makes a house a ranch? It is all about the footprint. You are looking for a horizontal, low-profile structure. Here is what to expect:
- Single-story living: The primary living areas are on the ground level. This is huge for accessibility and aging in place.
- Open floor plans: Kitchens, dining areas, and living rooms often flow into one another. There are fewer interior walls to navigate.
- Attached garages: Most ranches feature a garage that connects directly to the house, keeping you dry when you bring in groceries.
- Large windows: Many designs incorporate picture windows or sliding glass doors that open up to patios or backyards.
Is a Ranch Right for Your DIY Goals?
For homeowners who like to tackle projects themselves, ranch-style homes have distinct advantages. Renovation is often easier because you are working on one level. Painting ceilings? You just need a sturdy ladder. Fixing a leaky roof? It is more accessible than a multi-story Victorian.
However, the wide footprint means a larger roof and more exterior siding to maintain. If you plan to do your own painting or siding replacement, the square footage adds up quickly. Be sure to budget for heavy-duty ladders, scaffolding for high eaves, and plenty of drop cloths. Safety first. A fall from a roof or ladder is not worth the save on contractor fees.
Common Renovations for Ranch Homes
People often buy ranches because they are easy to update. The most common project? Opening up the space even further. Since these homes were built in the mid-20th century with many small rooms, homeowners love removing non-load-bearing walls to create a modern open concept.
Other popular upgrades include:
- Adding a master suite: If the house has a large lot, you can often expand the footprint to add a bigger bathroom or walk-in closet.
- Finished basements: Many ranches come with unfinished basements. Converting this into a home theater, gym, or rental unit adds significant value.
- Landscaping integration: The horizontal nature of the home makes it easy to blend indoor and outdoor spaces with decks, patios, and large sliding doors.
Finding Your Next Ranch
When searching for a ranch-style home, look for original features. Mid-century ranches often have beautiful hardwood floors, exposed beams, and large windows that let in natural light. These are the bones that make the style special. Newer constructions might mimic the look but lack the character.
Check the roof age. A ranch’s low pitch can hide water damage or shingle wear. If you
The Evolution of the Cape Cod Style
You probably know the vibe. Low profile. One and a half stories. A steep roof that sheds snow like a dream. The Cape Cod house isn’t just a style; it’s a structural puzzle waiting for someone with patience and a drill.
Popularized after World War II, ranch-style homes dominate the landscape with their single-story sprawl, open plans, and sliding glass doors that blur the line between inside and out. They’re practical. They’re everywhere. But if you’re looking for a renovation project that rewards precision over square footage, look up.
3. Cape Cod Homes
The Cape Cod is different. It’s compact. Vertical. Built to survive harsh winters in New England, the style has spread nationwide because the core concept is simple: keep the heat in, keep the cold out.
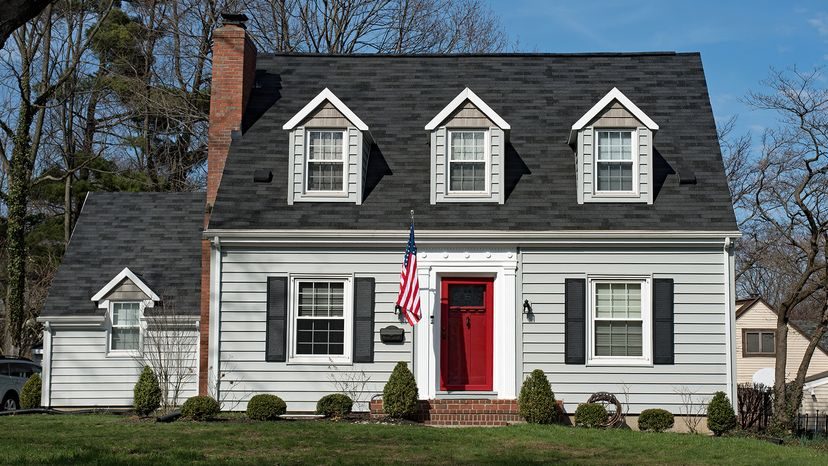
Traditionally, these homes feature a central chimney, steeply pitched roofs, and dormer windows that punch through the eaves to let light into the upper level. The exterior is often cladded in weatherboard siding, usually painted white with shutters, or sometimes cedar shake for a more rustic touch.
For the DIY homeowner, the Cape Cod offers a unique set of challenges and rewards. The steep roof means you need proper safety gear for any exterior work. Ladders, harnesses, and a steady hand are non-negotiable when you’re dealing with pitches that can exceed 60 degrees. But the payoff? More usable square footage in the attic than you’d expect.
Most Cape Cod renovations focus on maximizing that second floor. The dormers aren’t just aesthetic; they’re functional extensions of living space. Adding or enlarging dormers can transform a dark, cramped attic into a bright bedroom or home office. It’s a classic upgrade that increases value without requiring a foundation pour or a second story build.
Interior layouts in Cape Cods tend to be tighter. The living room is often central, with bedrooms clustered on either side. Kitchens might be small or tucked into a corner, a holdover from their colonial roots where efficiency mattered more than entertainment space.
Renovating a Cape Cod often means opening up that central core. Removing non-load-bearing walls between the kitchen and living area can create the modern flow people crave, while preserving the home’s historic charm. You’re not knocking down the skeleton; you’re just rearranging the organs.
Materials matter here. If you’re replacing siding, choose vinyl or fiber-cement that mimics the traditional wood profile. It’s easier to install and requires less maintenance than real wood. For the roof, asphalt shingles are the standard, but consider standing-seam metal if you want longevity and that sleek, modern contrast against the traditional shape.
Don’t ignore the windows. Original Cape Cods often have small, double-hung windows. Upgrading to larger units, especially in the dormers, floods the space with natural light. It changes the entire feel of the house. Suddenly, that cozy cottage feels expansive.
The central chimney is another key feature. It’s often the structural heart of the home. If you’re planning to upgrade your heating system, you’ll likely need to address the chimney flue. A professional liner installation is wise here. You don’t want to risk a fire hazard or draft issues by DIY-ing something that complex.
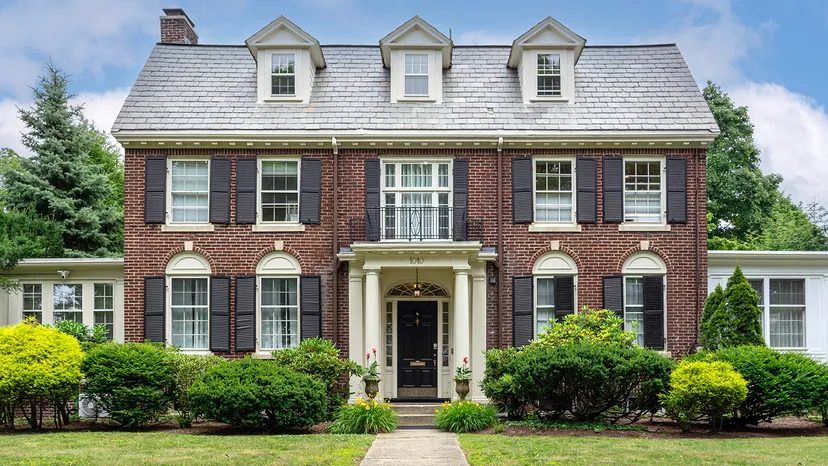
Colonial-Style Homes: The Symmetrical Standard
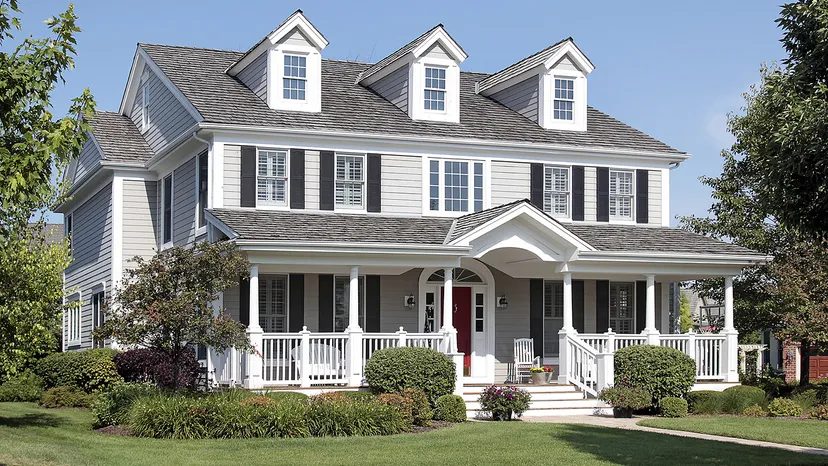
If Cape Cod homes are the cozy, weather-beaten survivors of the East Coast, Colonial-style homes are their polished, symmetrical cousins. You’ll spot them instantly by their balanced facades. The front door sits dead center. Windows line up in perfect rows above and below. It’s order imposed on wood and brick, a design meant to project stability as much as shelter.
Unlike the rugged, utilitarian origins of the Cape Cod, Colonials trace their roots back further, evolving from early English settler homes. But they share that DNA of practicality. They were built to last, and they were built to resist the cold.
Why the Symmetry Matters
The symmetry isn’t just aesthetic. It’s structural. In a traditional Colonial, the floor plan mirrors itself. Rooms on the left match rooms on the right. This isn’t just for looks. It makes renovation and DIY updates more predictable. You know where the load-bearing walls likely are. You know where the plumbing stacks tend to run, usually in the center of the house.
Most Colonials are two stories full. Some are two-and-a-half, with usable attic space tucked under the eaves. They’re common in suburban developments across the Northeast and Mid-Atlantic, but you’ll find them all over the country now. Builders love them because the footprint is efficient. Square footage goes further.
Rooflines and Dormers
The roof is usually pitched, often gable-ended. Steep pitches help shed snow, a nod to their Northern heritage. Dormer windows often break up the roofline, letting light into the upper level. If you’re planning a renovation, these dormers are key. They’re not just decorative. They add headroom and ventilation to an attic you might convert into a bedroom or office.
Materials matter here. Brick, clapboard, or stone veneer are common. If you’re doing this yourself, know your materials. Brick requires tuckpointing skills. Clapboard needs careful caulking and painting to keep moisture out. Stone is heavy; make sure your foundation can handle it.
DIY Considerations for Colonials
Renovating a Colonial often means respecting that symmetry. If you’re adding a window, don’t just punch a hole in the wall. Match the existing style. Double-hung windows are standard. Measure carefully. The frames are usually deep. You’ll need proper flashing to prevent leaks. That’s a common DIY mistake. Skip the flashing, and you’ll have rot within a few years.
Interior updates can be trickier. Original Colonials often have narrow hallways and small rooms. Opening them up means dealing with load-bearing walls. That’s where you call in a pro, or at least consult one. Don’t guess. A collapsed beam is expensive to fix.
Comparison: Colonial vs. Cape Cod
Which should you choose? Or rather, which fits your current home?
Cape Cod homes are smaller. Usually one or one-and-a-half stories. Steeper roofs. Dormers are common but not always present. They feel compact. Intimate.
Colonials are taller. Two full stories. Symmetrical in every way. They feel more formal. More spacious, vertically speaking.
If you’re doing a DIY renovation, Colonials offer more linear square footage to work with. Cape Cods require creative use of attic space
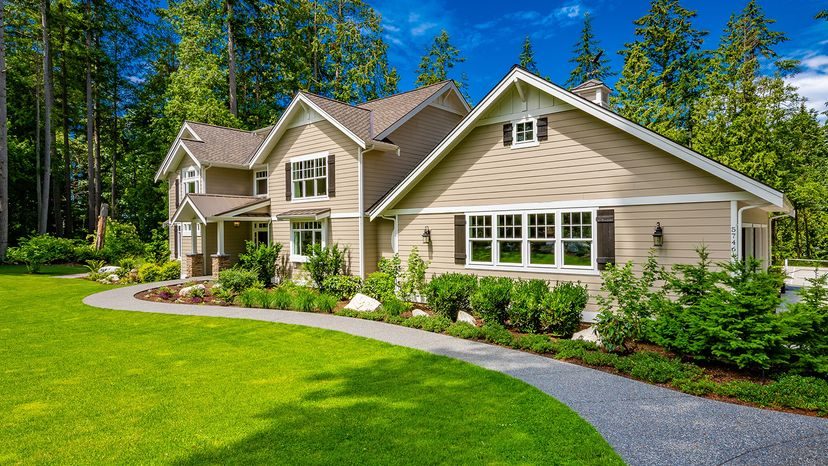
Craftsman homes offer a distinct contrast to the rigid symmetry of colonial designs. Where colonials look outward with formal precision, Craftsman houses look inward, prioritizing function and warmth over grandeur. You won’t find tall, narrow windows or imposing central doors here. Instead, the focus shifts to low-pitched gable roofs, wide eaves, and heavy, tapered columns that anchor the structure to the earth.
This style emerged from the Arts and Crafts movement, a reaction against the industrialization of the late 19th century. The goal was honest craftsmanship. Materials matter deeply. You see natural wood, stone, and brick used exactly as they are, without hiding the grain or texture. If you’re planning a renovation, this means preservation is often more important than replacement.
Identifying Key Features
Recognizing a Craftsman home helps guide your restoration choices. Look for these telltale signs:
- Broad, overhanging eaves that create deep shadows and protect the siding.
- Exposed rafters or decorative beams under the gables, often with knee braces.
- Front porches that are integral to the design, supported by substantial square or round columns.
- Multi-pane windows, usually in a grid pattern (often 6-over-1 or 8-over-1), with sturdy sashes.
- Built-in furniture like bookshelves, window seats, and dining room buffets, often crafted from oak or other hardwoods.
These elements aren’t just aesthetic. They serve a purpose. The deep eaves shed rain away from the foundation. The porch extends living space into the outdoors. The built-ins maximize storage in homes that often have smaller footprints than modern counterparts.
Renovation Challenges and Opportunities
Restoring a Craftsman home requires a different toolkit than flipping a colonial. You’re not just painting; you’re uncovering. Many Craftsman houses hide original woodwork under layers of paint or drywall. Peeling back those layers reveals the joinery and craftsmanship that define the style.
The heart of a Craftsman renovation lies in respecting the original materials.
Be prepared for surprises. Older homes often have knob-and-tube wiring or asbestos-containing materials in insulation and flooring. A thorough inspection is non-negotiable. You need to know what’s behind the walls before you start pulling anything down.
Electrical updates are common. Most Craftsman homes were built before the widespread use of modern appliances. Upgrading the service panel and adding outlets to accommodate today’s tech is a frequent, necessary task. But don’t just run new wires and patch it up. Try to route new cables through existing chases or baseboards to minimize visible changes.
Plumbing is another area to watch. Galvanized steel pipes were common in early 20th-century Craftsman builds. They corrode over time, restricting water flow and risking leaks. Replacing them with PEX or copper is a standard upgrade. Again, try to be discreet. Cut into walls only where necessary and repair with matching plaster or drywall to maintain the historic character.
Preserving the Porch
The front porch is often the soul of a Craftsman home. It’s not an afterthought; it’s a destination. If your porch shows signs of rot, sagging, or peeling paint,
6. Victorian Homes
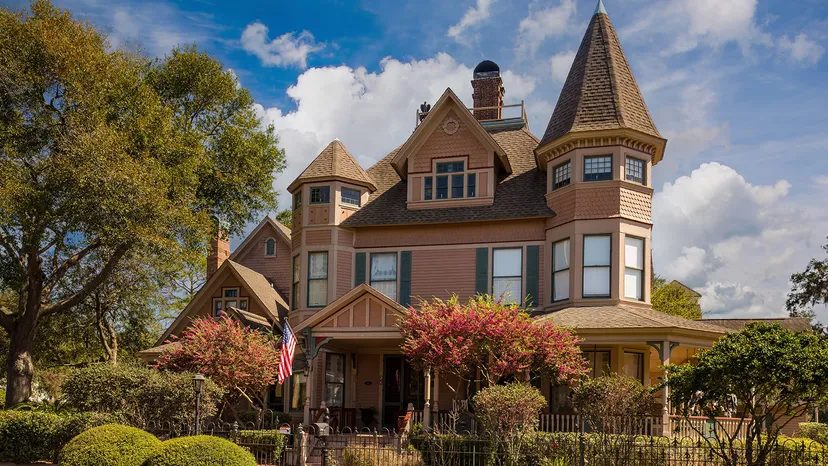
If Craftsman is about honest materials, Victorian is about excess. These homes don’t whisper. They shout in color and complexity. Originating in the mid-to-late 19th century, this style covers a wide range of sub-types, from the ornate Queen Anne to the simpler Stickley. But they all share one thing: they are hard to maintain and expensive to renovate if you get it wrong.
You can spot them by the steep, irregular rooflines. Look for the wraparound porches with decorative spindle work. The exteriors are rarely one color. They use multiple shades of paint to highlight the intricate trim and board-and-batten siding. Inside, the layout is often asymmetrical. You’ll find tall ceilings, elaborate crown molding, and stained glass windows that were designed to catch the light of gas lamps, not LED bulbs.
Renovating a Victorian requires a specific mindset. You aren’t just fixing walls. You are restoring artistry.
Key features to identify:
- Asymmetrical Facades: No mirror images. The front door is often offset.
- Turrets and Towers: Round or square projections that add visual weight.
- Decorative Trim: Known as “gingerbread,” this woodwork is intricate and fragile.
- High-Contrast Paint: Three or more colors on the exterior shell.
Why Victorian Renovation is Tricky
Most DIYers underestimate the scale of work. A Craftsman home might need new caulk and paint. A Victorian needs preservation. The wood trim is often original pine or poplar, softened by over a century of humidity. Sanding it down can destroy decades of patina. Or worse, you might sand through to nothing.
Then there is the plaster. Drywall didn’t exist when these houses were built. Walls are lath and plaster. Cracks are common. Holes from hanging pictures are permanent unless you learn the skill of patching plaster, which is a different beast entirely. It requires setting time, joint compound, and patience. You can’t just slap mud on it and move on.
Safety is another layer. These homes were built before modern electrical codes. Knob-and-tube wiring might still be hidden in the walls. Lead paint is almost a guarantee. Asbestos in floor tiles or pipe insulation is possible in later additions. You aren’t just painting. You are navigating a minefield of old materials.
Tools for the Job
Standard power tools help, but precision tools are key.
- Oscillating Multi-Tool: Essential for cutting out damaged plaster without wrecking the surrounding lath.
- Detail Sander: For those tight corners in the crown molding. A big sander won’t fit.
- Heat Gun: To strip old paint safely, though testing for lead is mandatory first.
- Plaster Gauges: For mixing and applying plaster patches correctly.
- High-Lift Scaffolding: Victorian ceilings are high. You need reach to do the trim work properly.
Where to Start
Don’t tackle the whole house. Pick one room. A dining room with a chandelier and wainscoting is a good test. If you can restore the wainscoting without breaking the wood, you’re ready for the exterior trim.
Modern Farmhouse-style Homes
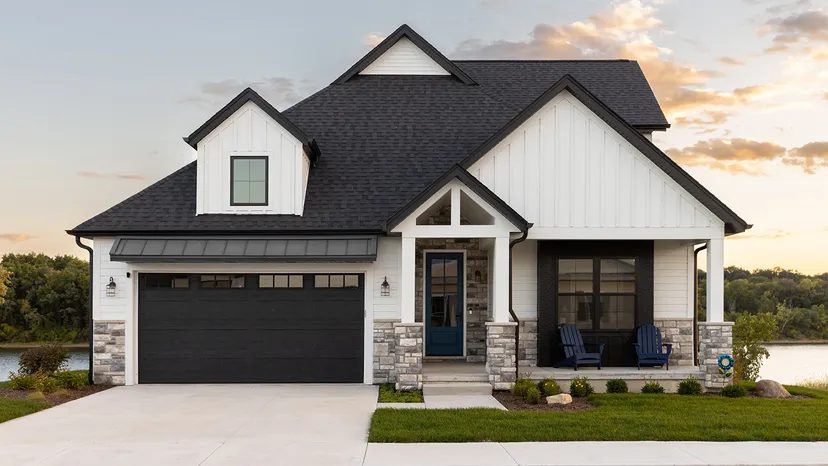
The shift from ornate Victorians to the clean, stripped-back aesthetic of the Modern Farmhouse-style Homes is not just a trend—it’s a reaction. You want that rustic charm without the dust-gathering trim of a Queen Anne. These homes blend traditional country warmth with contemporary minimalism. Think shiplap, not gargoyles.
Key Design Elements and Materials
The look is defined by what you remove as much as what you add. Steep roofs remain, but they are simpler. The asymmetry is still there, but it’s balanced by symmetry in the layout.
- Exterior Cladding : Metal roofs are standard. Standing seam metal is durable and fits the vibe. White or off-white lap siding is the default. Brick accents, usually on the lower half or chimney, add texture without the fuss.
- Windows : Narrow windows from the Victorian era give way to wider, black-framed windows. Steel or aluminum frames are common. They let in light and provide a sharp, modern contrast to the white walls.
- Front Porches : A wraparound porch is still a staple, but it’s simpler. No decorative spindles. Just square columns and a straight roofline. It’s functional. A place to sit, not a place to show off.
Renovation Considerations for DIYers
If you’re tackling a renovation in this style, the work is less about intricate carving and more about precision and material selection.
- Siding Installation : Properly installing lap siding requires a level, a chalk line, and patience. You’re aiming for straight lines. Gaps must be even. Use a weather-resistant barrier underneath. Moisture is the enemy.
- Metal Roofing : This is a big job. If you’re not experienced with standing seam metal, hire it out. The seams need to be crimped tightly. Improper installation leads to leaks and noise during storms.
- Window Replacement : Swapping out old, narrow windows for larger, black-framed ones changes the entire feel of the house. Ensure the rough opening is squared. Use shims to level. Seal well. Black frames can show water spots, so consider maintenance.
Why This Style Resonates
Homeowners are drawn to the Modern Farmhouse-style Homes because they feel grounded. They’re not trying too hard. The aesthetic is inviting but not overwhelming. It’s a style that works in both rural settings and suburban neighborhoods.
The key to pulling off the modern farmhouse look is restraint. Less is more, but only if the materials are high quality.
Common Mistakes to Avoid
- Overusing Shiplap : It’s everywhere now. Use it on an accent wall or the exterior, not on every surface. It can look cheap if overdone.
- Ignoring Proportions : The roof pitch should be moderate. Too steep, and it feels like a cottage. Too flat, and it loses the farmhouse character.
- Cheap Hardware : The black fixtures, door handles, and window frames are the jewelry of the house. Don’t skimp. They get a lot of attention.
Where It Fits
This style is prevalent across the United States, from Texas to Maine. It’s versatile because it doesn’t rely on historical accuracy. It borrows from the past
Midcentury Modern Homes
Forget the white stucco. Forget the barn wood. Midcentury modern homes operate on a different frequency. They are sleek. Sharp. Grounded in the post-war optimism of the 1950s and 60s.
The aesthetic is clean, but not sterile. It’s about bringing the outside in. Large panes of glass replace solid walls. The line between interior living space and the backyard dissolves. You aren’t just looking at a garden; you’re sitting in it.
Key Design Elements
- Low-pitched or flat roofs with wide, overhanging eaves. These aren’t just stylistic choices. They manage rain and sun, protecting the glass from direct glare.
- Open floor plans before it was a buzzword. Rooms flow into one another. There are no closed-off dining rooms or stuffy hallways.
- Natural materials. Wood is king. Think teak, walnut, and oak. It’s often paired with brick, stone, or concrete slabs. The contrast is intentional. Warm wood against cool stone.
- Bold geometric shapes. Rectangular, square, sometimes angular. Symmetry is loose, not rigid.
DIY Renovation Considerations
If you’re tackling a midcentury modern home, you’re dealing with specific structural and material quirks. It’s not just about painting walls white and calling it a day.
1. The Glass
Original windows are often single-pane. They leak energy. They rattle. Replacing them with modern, energy-efficient glazing while maintaining the original steel or aluminum frames requires precision. If you’re doing this yourself, you’ll need careful measuring tools and a steady hand. Improper sealing leads to drafts. Bad drafts kill comfort.
2. The Flooring
Herringbone hardwood. Terrazzo. Polished concrete. These are common. Restoring hardwood means sanding and refinishing. It’s dusty work. You need a drum sander, edge sander, and good respirator. Terrazzo is tough but can crack. Concrete is durable but cold without radiant heating or thick rugs.
3. The Walls
Many original walls are drywall or plaster. Some have exposed beams. If you’re knocking down walls to open up the space, check for load-bearing structures. Midcentury homes often use post-and-beam construction, which gives you flexibility. But not all do. A structural engineer’s report is cheap insurance compared to a collapsed ceiling.
4. The Hardware
Original light fixtures and cabinet pulls are iconic. Sunburst sconces. Geometric knobs. Don’t replace them with generic silver fixtures. It ruins the vibe. Find period-appropriate reproductions. Restore, don’t replace. It saves money and keeps the home’s soul intact.
Why It Matters Now
People want this style because it feels timeless but lived-in. It doesn’t try too hard. It’s honest about its materials. A midcentury home doesn’t hide its structure. The beams show. The pipes might run along the ceiling. There’s a certain honesty in that.
It’s also efficient. The open layout reduces the need for large HVAC systems. The low profile works with passive solar heating. You’re not fighting the architecture. You’re working with it.

The Geometry of an A-frame
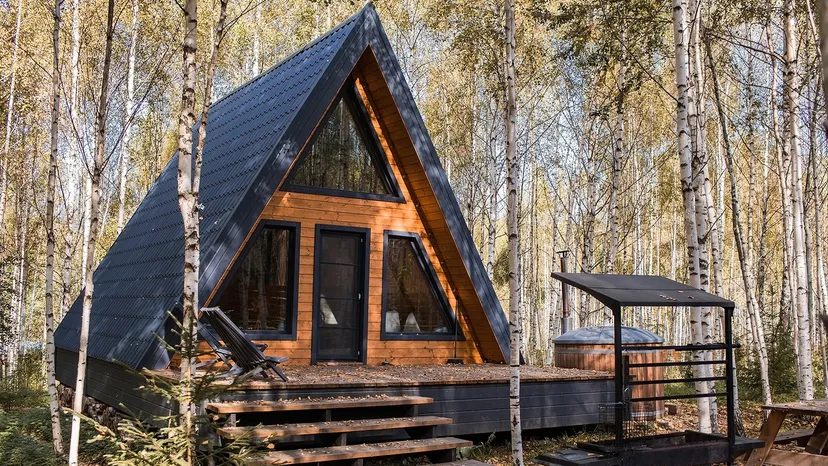
If you are looking at a house that looks like a giant letter A, you are staring at an A-frame. These structures rose from the post-war boom, hitting their peak popularity between the late 1950s and the mid-1970s. They are distinct from the boxy rectangular forms of midcentury modern homes that dominated the era. While midcentury homes leaned into horizontal lines and flat roofs, the A-frame leans vertical. It is a story of geometry and gravity.
The design is brutally simple. Two sloping roof sides meet at a central ridge, forming the walls themselves. This means the interior space is defined by the exterior shape. You lose some usable square footage in the eaves—those low, awkward corners near the ground—but you gain a dramatic, cathedral-like volume in the center. This open, airy feel is a major draw for homeowners who want a sense of spaciousness without the cost of a massive footprint.
Why homeowners still love the A-frame style
People do not just buy these homes for the nostalgia. The aesthetic is practical in ways that are easy to overlook. The steep pitch sheds snow and rain efficiently, which is why you see them clustered in mountain towns and ski resorts. A flat roof might trap snow until the structure collapses. A steep one lets nature do the work.
Integration with nature is another key factor. Large triangular windows often dominate the front gable, pulling the forest or mountain view into the living room. This blurs the line between inside and outside, a core principle of the midcentury movement. The result is a home that feels less like a building and more like a shelter.
Renovation challenges and DIY considerations
Renovating an A-frame requires a different mindset than a standard rectangle. The walls are not perpendicular to the floor. This affects everything from hanging a TV to installing cabinets. Standard modular furniture often looks out of place against sloping walls. You will need custom solutions or a willingness to adapt your layout to the angles.
For the DIYer, the roof structure is both a blessing and a curse. On one hand, the truss system is often straightforward. On the other hand, the height makes working at the ridge line dangerous. Safety gear is non-negotiable. If you are replacing siding or windows, you are working on a slope. That changes the physics of ladder use and material handling.
Materials matter. Wood is the traditional choice, offering warmth that complements the rustic vibe. Vinyl siding can work but often looks cheap against the dramatic architecture. If you are updating the exterior, consider cedar shakes or board-and-batten designs to maintain the authentic midcentury feel. Inside, exposed beams are common. If you are stripping the original finish, be prepared for potential lead paint or asbestos, especially in older builds. Test before you sand.
Where A-frames are most common
You will find these homes in two main contexts. First, the original post-war suburbs, where developers used the simple design to build affordable starter homes quickly. Second, the recreational markets. If you are driving through the Adirondacks, the Rockies, or the Cascades, you will see dozens of them. They were designed as vacation cabins. Many have been converted into full-time residences.
The question is not whether you can afford an A-frame. It is whether you can live with its
The Vertical Density of Townhouses
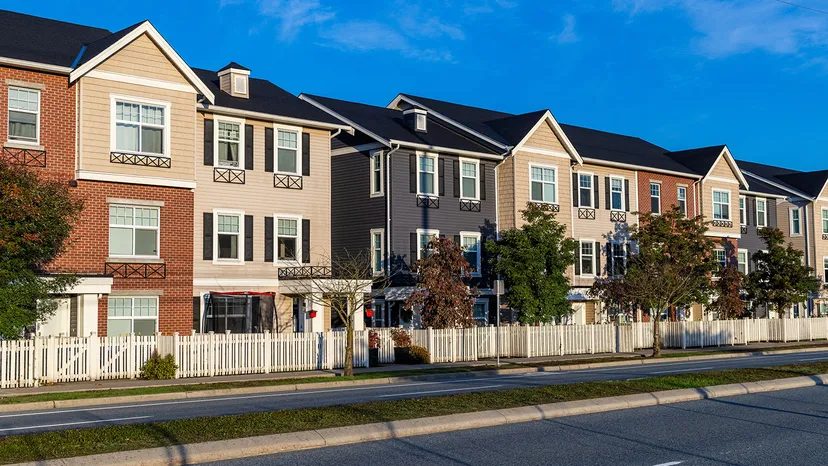
Step away from the mountain slopes and the sharp angles of the A-frame. You are now standing on the sidewalk looking up at a row of attached homes. This is the townhouse. It’s the standard answer to urban density, but it’s far more than just a brick box stacked on another brick box.
The definition is simple but tricky. A townhouse is a residential building with three or more stories, sharing side walls with adjacent units. It usually includes its own front and back entrances. This isn’t an apartment. You own the structure. You own the land beneath it, too. That distinction matters when it comes to maintenance responsibilities and resale value.
Why Choose a Townhouse?
Most buyers pick this style for the location. Townhouses dominate city centers where land is scarce and expensive. They offer the privacy of a standalone home without the sprawling lawn you have to mow.
- Low Maintenance Exterior: TheHOA or condo board usually handles the roof and exterior walls. You focus on the inside.
- Community Feel: Shared walls mean shared noise, yes. But they also mean shared security. You often have a tighter-knit street vibe.
- Cost Efficiency: Compared to a detached single-family home in the same zip code, the price per square foot is often lower. You get more house for your money.
The Trade-Offs
It’s not all sunshine and shared driveways. The vertical layout can be a workout for your knees. Multi-level living means constant stair climbing. If you plan to age in place, check for elevator installations or ground-floor units.
Noise transfer is real. Sound travels through shared walls and floors. Good construction helps, but thin drywall and cheap insulation will ruin your quiet evenings. Look for homes with soundproofing upgrades or thicker wall assemblies.
DIY Potential in a Vertical Layout
Renovating a townhouse requires a different mindset than a ranch-style home. You are working in a narrow footprint.
- Staircase Renovation: The central staircase is often the focal point. Replacing carpet with hardwood or installing a modern railing can transform the space. Check local building codes for railing height and baluster spacing.
- Kitchen Layouts: Townhouse kitchens are typically galley-style or L-shaped. Maximizing vertical storage is key. Open shelving can make the space feel larger, but it requires constant organization.
- Basement Finishing: Many townhouses have walk-out basements. This is prime rental or in-law suite potential. Ensure proper egress windows and moisture control before framing.
Which Townhouse is Right for You?
Not all rows are created equal. Some communities feel like villages, others like dorms.
- End Units: These offer extra windows and sometimes a small side yard. They are quieter and more private but often cost more.
- Mid-Row Units: You share walls on both sides. Less privacy, but often the most affordable option in the block.
- Garden Level: Ground-floor units with private patios. Great for pets and direct outdoor access, but beware of street noise and security concerns.
Maintenance Responsibilities
Before you sign, read the HOA bylaws. Who fixes the roof? Who cleans the gutters? In some townhouse associations, you own the shingles. In others
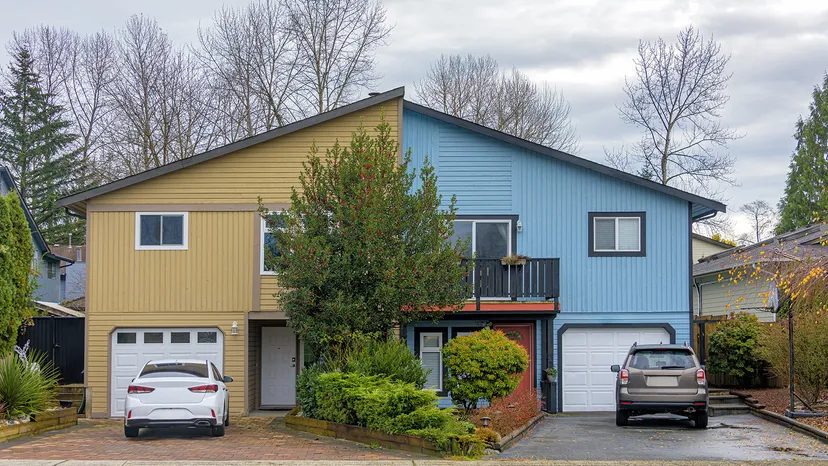
Duplexes are a step up from townhouses in terms of ownership structure, though they share the same urban footprint. Instead of a long row of attached units, you’re looking at a single structure divided into two separate living units. These are common in established neighborhoods where zoning allows for higher density without the height of a high-rise. The key difference here isn’t just the layout; it’s the potential for income.
For homeowners who prefer hands-on work, a duplex offers a unique set of challenges and rewards. You aren’t just maintaining one kitchen or one HVAC system. You’re managing two. This means dual roofing surfaces, two sets of plumbing stacks, and potentially two electrical panels. It’s more work, but it also means more leverage.
Why Choose a Duplex Over a Single-Family Home?
The primary draw is often financial. Many owners choose to live in one unit and rent out the other. This “house hacking” strategy can cover a significant portion, if not all, of your mortgage. It’s a practical way to enter the real estate market with less financial risk. But it’s not just about the numbers. It’s about control. When you own the building outright, you decide on renovations. You don’t have to wait for a landlord to fix a leaky faucet in the rental unit.
However, this comes with a trade-off. Privacy is reduced. Your tenant lives in the same structure as you. Soundproofing becomes a major concern. If you’re planning DIY updates, focus on insulation. Acoustic underlayments under flooring and extra layers of drywall in shared walls can make the difference between a happy tenant and a noisy complaint.
Multi-family Homes: Scaling Up the Concept
Beyond duplexes, you’ll find triplexes and fourplexes. These are essentially the same structure, just with more units. The maintenance complexity increases linearly with the number of doors. More tenants mean more wear and tear on common areas like driveways, walkways, and landscaping.
For a DIY owner, multi-family homes require a different mindset. You can’t just fix things when they break. You need a preventive maintenance schedule. Roof inspections every spring. Gutter cleaning every autumn. HVAC filter changes every three months. These tasks are manageable if you break them down into manageable chunks. But they are constant.
Key Considerations for DIY Maintenance
When working on your own duplex or multi-family property, safety and efficiency are paramount. Here are some concrete steps to keep in mind:
- Electrical Safety: Never work on live circuits. If you’re updating outlets or switches in a rental unit, turn off the power at the breaker. Test with a voltage tester before touching any wires. Shared electrical panels can be confusing. Label every circuit clearly.
- Plumbing Access: Water heaters and main shut-off valves are critical. If a pipe bursts in the tenant’s unit, you need to shut off the water quickly. Know where the main valve is. Consider installing individual water meters for each unit. This encourages tenants to conserve water and makes billing straightforward.
- Roofing: A duplex roof has two slopes. Check for missing shingles, damaged flashing, and clogged drains. If you’re not comfortable working at height, hire a pro. Falls are no joke. But you can do the
Buying a duplex or fourplex sounds like a smart play. You get two (or more) separate living units in one building. Maybe they sit side by side, sharing a wall. Or maybe one is stacked above the other. Investors love them for rental income. Families love them for shared housing or aging-in-place arrangements. But let’s be honest. Multi-family zoning, maintenance headaches, and neighbor disputes are real.
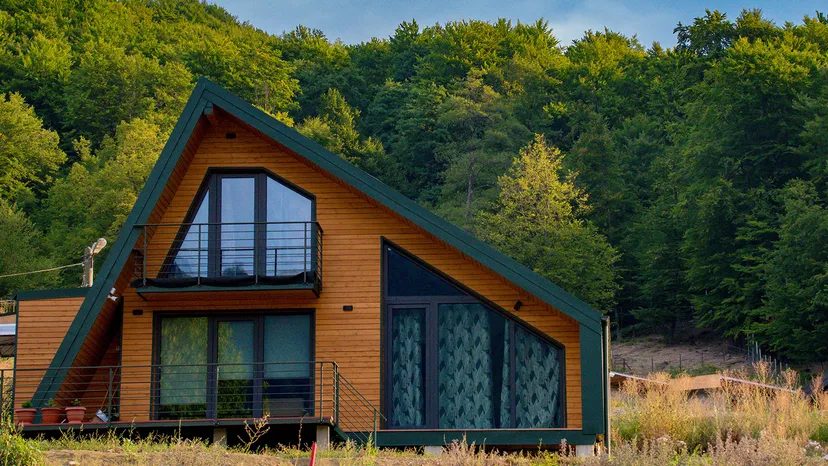
So, what if you could build the home itself without the traditional construction chaos? Enter prefabricated and modular homes. It’s not just a trailer park stereotype anymore. The industry has shifted. You can get high-end, custom designs. But the process is different. Much different.
How Modular Homes Are Built
You don’t build these on-site from scratch. That’s the first thing to understand. The structure is manufactured in a controlled factory environment. Think climate-controlled. Precise machinery. Assembly line efficiency.
The home is built in sections called modules. These are three-dimensional units. Each section includes flooring, walls, electrical, plumbing, and insulation. They are built to strict building codes. Often, they exceed local standards because they must withstand transportation stresses.
Once the modules are ready, they are transported to your lot. A crane lifts them onto the prepared foundation. Then, the magic happens. Workers connect the sections. They seal the seams. They tie into the utility lines. It’s faster. But it’s not magic. It’s logistics.
Why Choose Prefab? The Speed and Control Factor
Time is money. Traditional construction can drag on for nine to twelve months. Weather delays. Supply chain hiccups. Labor shortages. A modular home can be completed in three to six months.
Why? Because while the foundation is being poured on-site, the house is being built in the factory. That parallel process cuts months off the timeline. You move in sooner. You save on loan interest. You stop paying rent while waiting to own.
But speed isn’t the only benefit. Quality control improves. In a factory, wood doesn’t warp from rain. Insulation is installed precisely. Errors are caught before the wall is closed up. You’re not relying on a single crew’s skill level on a rainy Tuesday. You’re relying on a system.
Where to Find and How to Navigate the Process
Finding a builder is step one. Look for companies with a portfolio of completed projects. Not just renderings. Real photos. Real homes. Check local building departments. Some areas have specific zoning laws for modular structures. Verify that the manufacturer is certified in your state.
You’ll need land. A build-ready lot with utilities accessible. The site prep still happens on-location. Grading. Septic or sewer connection. Electrical hookup. You can’t skip this. The factory just handles the structure.
Which Materials Are Used?
Modular homes use standard materials. Dimensional lumber. Drywall. Asphalt shingles. Vinyl siding. It’s not some exotic, unproven tech. You’re getting a stick-frame house, just built in a different place.
This matters for resale. Appraisers understand modular homes. Lenders finance them like traditional houses. You’re not stuck with an asset that’s hard to value.
Safety and Structural Integrity
People worry about durability. Will it shake apart in a wind
Prefabricated homes change the game for site-built structures, but they don’t always apply to the other end of the housing spectrum: shared ownership models. Co-ops and condos offer a different set of compromises. You aren’t just buying walls; you’re buying into a rulebook.
Condominiums are straightforward. You own the unit. You own the space inside the four walls. You pay maintenance fees for the shared areas like the lobby, roof, or pool. The deed is clear. It’s yours.
Co-ops are trickier. You don’t own real property. You own shares in a corporation that owns the building. Your “key” is actually a proprietary lease. This distinction matters more than most buyers realize. It affects financing. It affects taxes. It affects your ability to sell.
Why the Distinction Matters for Buyers
Banks treat co-ops and condos differently. Lenders often require a higher down payment for co-ops. Some banks won’t finance them at all if the building has too many investor-owned units. If you’re working with a tight budget, this could knock you out of the running before you even schedule a tour.
Condos are generally easier to finance. Traditional mortgages apply. But check the building’s financial health first. A condo association with low reserves is a red flag. You’ll inherit their problems through higher fees or special assessments.
Co-ops have strict approval processes. The board can reject you for any reason. They might dislike your job. They might not like your credit score. They might just not like your face. It’s subjective. That’s the risk.
How to Evaluate the Hidden Costs
Look beyond the monthly fee. Ask for the last two years of financial statements. Are they operating in the black? Is there a pending special assessment for a new roof or elevator repairs?
Special assessments can cost tens of thousands of dollars overnight. Check the reserve fund before you sign.
Insurance is another trap. Condo insurance covers your interior and liability. Co-op insurance often requires a “walls-in” policy that’s more complex and expensive. Get quotes from multiple insurers before making an offer.
Which Model Fits Your Lifestyle?
Condos offer freedom. You can rent out your unit. You can sell quickly. You don’t need board approval. Co-ops offer community. They’re often quieter. More stable. Neighbors know each other. But that stability comes with control. The board dictates subleasing rules. They might ban short-term rentals entirely.
If you want flexibility, go condo. If you want community and don’t mind paperwork, consider co-op.
Where to Find the Best Deals
Look for distressed buildings. Condos with high vacancy rates may have lower maintenance fees. Co-ops with boards looking for stability might be more flexible on financing requirements.
Work with a real estate agent who specializes in shared ownership. Generalists often miss the nuances of board approvals or reserve fund health.
Safety in the Details
Never waive the review of financial documents. Skip this step at your peril. A building with deferred maintenance will bleed you dry. Ask about pending litigation. Lawsuits against co-ops and condos are common. They can drain reserves.
Check the subletting policy. If you plan to travel or work remotely
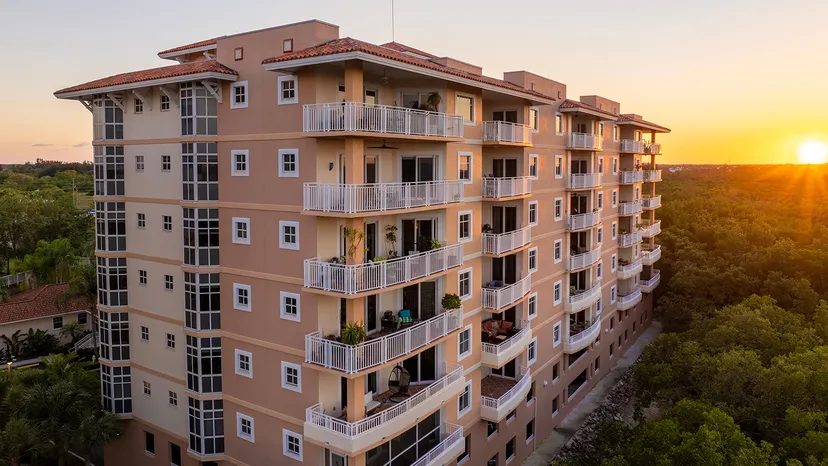
Living in a dense city usually means trading square footage for access. And let’s be honest, that access often comes with a price tag. Whether you are looking at a housing cooperative or a condominium, you are likely chasing the same prize: shared maintenance costs and amenities that would bankrupt a single homeowner. But the path to getting that key to your door is fundamentally different.
In a condo, you buy a deed to a specific unit. It is real property. You own the walls, the floor, the ceiling. You can sell it, rent it, or leave it to your heirs with relative ease. The homeowners association (HOA) handles the building’s exterior and common areas, funded by your monthly dues.
A housing cooperative? That is a different beast entirely.
Why Co-op Shares Change the Game
When you buy into a co-op, you aren’t buying real estate in the traditional sense. You are buying shares in the corporation that owns the entire building. Your “unit” is really just a proprietary lease granting you the right to occupy a specific apartment.
This structure creates a distinct financial dynamic.
- Lower Purchase Price: Co-op units often have a lower sticker price than comparable condos in the same neighborhood.
- Higher Monthly Fees: Because the cooperative covers the building’s underlying mortgage and property taxes, your monthly maintenance fees are significantly higher.
- Tax Deductions: Here is the kicker. A portion of your monthly fee is deductible as mortgage interest and property tax. In a condo, you pay property taxes and mortgage interest separately, but in a co-op, those costs are baked into your share of the building’s debt.
How the Approval Process Filters Buyers
This is where the rubber meets the road. If you are a DIYer who likes control, a co-op might feel restrictive. The board of directors, made up of resident shareholders, has veto power.
Why? Because they want to protect the building’s financial health and social fabric. The board reviews your financials, your background, and even your interview. They can reject you for reasons that have nothing to do with your ability to pay. Condo associations typically have much lighter oversight, focusing mainly on rule violations rather than financial screening.
Which Option Fits Your Renovation Plans?
If you plan to gut the kitchen and redo the plumbing, check the bylaws first.
In a condo, you generally have more freedom to modify the interior of your unit, provided you don’t touch load-bearing structures or common elements. In a co-op, the board often has final say on any structural changes or even cosmetic updates that might affect the building’s aesthetic or insurance liability.
The shared amenities—gyms, roof decks, doormen—are usually identical in quality and access for both co-op and condo residents. The difference lies in the financial structure and the bureaucracy. You are paying for community and security in both, but in a co-op, you are also helping to service the massive mortgage on the whole building.
The Bottom Line for Homeowners
Both models offer a way into urban living without the burden of maintaining a standalone house. They pool resources. They spread risk. But the legal vehicle you use to get there dictates your tax situation, your resale flexibility, and who holds the keys to your future.
Condo ownership is straightforward