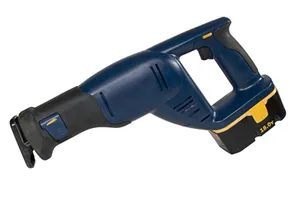
There is a name for that tool in every garage that looks like a hand saw having a nervous twitch. People call it a saber saw. Some call it a jigsaw. The confusion isn’t just semantic. It affects how you buy blades, how you hold the tool, and whether you end up with a clean cut or a ruined piece of trim.
The reality is simple. Both terms describe a powered saw with a reciprocating motor. The blade moves up and down rapidly. It cuts through wood. It slices metal. It handles plastic. It even tears through drywall. But the details matter. If you are planning to do the work yourself, understanding the mechanics is the only way to avoid injury or a botched job.
What Is a Saber Saw Really?
At its core, a saber saw is a versatile cutting tool. The motor drives a small blade in a reciprocating motion. This means the blade moves up and down across the object you are cutting. It is not a circular blade. It is not a chain. It is a straight blade that punches through material.
You can buy these tools with a kit of specialized blades or purchase them individually. The blades dictate the task. You will find coarse cuts for rough wood. Fine cuts for delicate trim. Blades designed specifically for metal. Others for plaster. And special options for plastic.
The tool itself has a few non-negotiable components.
- Trigger Switch: The main power control.
- Safety Button: A lockout mechanism to prevent accidental starts.
- Blade Lock: A lever or button that secures the blade in the holder.
- Shoe: The flat plate at the base. It keeps the blade at a specified distance from the work surface.
- Guide Fence: An optional attachment for cutting straight lines.
If you are looking at the tool from the front, with the handle on top, you are looking at a jigsaw. It is the same mechanism. Just a different grip. The handle on top allows you to turn the blade while cutting. It gives you more control for curves. A standard saber saw handle is sideways. It is better for plunge cuts and rougher work.
How to Safely Use a Saber Saw
Safety is not a suggestion here. It is a requirement. The teeth are sharp. They move fast. They do not care if you are wearing gloves. They do not care if you are distracted.
Start with eye protection. No exceptions. Flying debris from wood, metal, or plastic will find its way into your eyes. Period.
Select the correct blade first. Do not guess. Wood? Use a wood blade. Metal? Switch to a metal-cutting blade. Once selected, firmly attach it in the blade holder. Engage the blade lock. You should hear or feel it click into place. If the blade is loose, it will wobble. It will break. It will fly off.
Adjust the shoe. Set the height for the material thickness. If you need a bevel, adjust the angle now. Do not try to do it while cutting.
If you are starting in the middle of a sheet, you need a starting hole. Cut a hole in the material first. Insert the blade.
When you are ready to cut, plug the saw into a grounded electrical outlet. Check the cord. Look for frays.
Hold the handle firmly with both hands if possible. Align the blade near the mark. Do not touch the mark yet. Press the safety button. Press the trigger switch. The blade will start moving. Slowly follow the cut mark. Let the tool do the work. Do not force it. Forcing it breaks blades. It creates heat. It ruins the cut.
As you near the end of the cut, check the unsupported weight. If the piece is hanging free, it will splinter as the blade exits. Hold the end of the material. Support the cut-off piece. This is where most amateur mistakes happen. The cut looks perfect until the exit point looks like a ragged mess.
Remember that the teeth are sharp. Do not place the saw on surfaces it could damage. Not just the wood you are cutting. The floor. Your workbench. Your toes.
How to Maintain a Saber Saw
Maintenance is quick. And easy. If you ignore it, the tool fails.
Clean the saw periodically. Use an unused paintbrush or an air supply. Remove sawdust from the shoe.