























Життя в старій хаті або навіть просто в будинку, де дерев’яні сходи починають показувати свій вік, викликає особливий вид тривоги. Ви знаєте це почуття. Підозрілий скрип під ногою. Легке похитування, що змушує спрацювати всі почуття. Жах від удару п’ятою вранці, що перетворює вашу прогулянку на другий поверх на пригоду, про яку ви не мріяли.
Не панікуйте. Крихкі щаблі не завжди означають, що вам доведеться стикатися з клопотами масштабного будівництва. Є трюк. Він простий. Він швидкий. І він “економічний”. Ви можете подарувати своїм сходам друге життя без запорошеного будівельного майданчика або головного болю. Результат? Більш безпечні та тихі сходи та негайне полегшення у вашому повсякденному ритмі.
Виявлення проблеми: коли щаблі вимагають втручання?
Звуки та рухи, що сигналізують про неполадки
Не можна це ігнорувати. Сходи, які скриплять, або ступінь, що хитається, — це слуховий і тактильний сигнал тривоги. Щоразу, коли ви піднімаєтеся, більш виражений скрип або клацання сигналізують про те, що під ногами утворилася слабкість. Це не просто дратує. Це попередження, яке не можна ігнорувати, тому що на кону стоїть безпека.
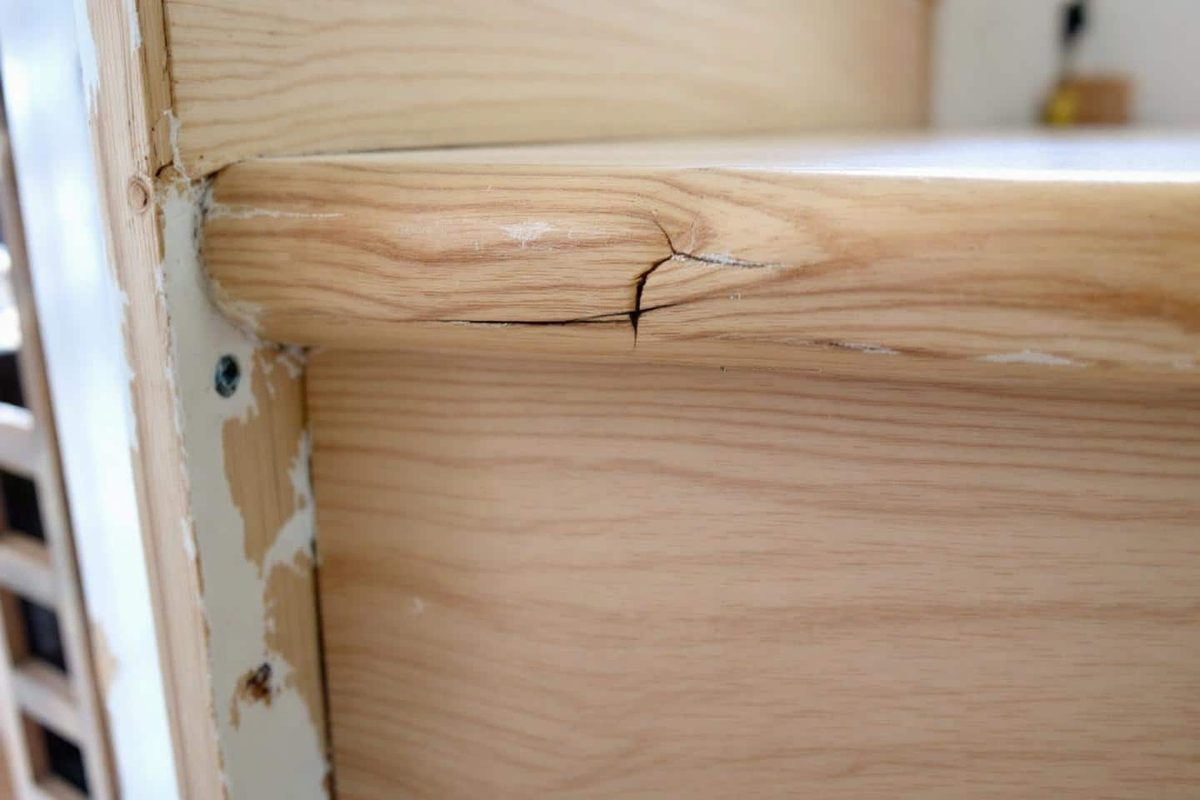
Огляд реального стану: тріщини, люфт і провисання
Перший крок — уважно оглянути підозрілий щабель. Декілька ознак повинні привернути вашу увагу:
- Видимі тріщини на бічній або лицьовій частині щаблі
- Невеликий люфт, помітний при натисканні на щабель рукою
- Невелике провисання чи деформація у деяких місцях
Ці ознаки не брешуть. Краще діяти, доки ситуація не погіршилася. Хороша новина: простого втручання може бути достатньо, якщо проблема виявлена вчасно.
Розумна підготовка: необхідні матеріали для ремонту вищого класу
Базовий набір під рукою
Немає потреби у складному інструменті. Невеликий набір аксесуарів, і все готове:
- Дві дерев’яні рейки (вибрані відповідно до ширини ступеня)
- Дерев’яний клей з підвищеною міцністю
- Шпаклівка по дереву
- Наждачний папір дрібної зернистості
- Струбцини (або важкі вантажі для притиску під час висихання)
- Канцелярський ніж та м’яка тканина
Секрет? Це спілка рейок та гарного дерев’яного клею. Нічого більше. Немає необхідності спустошувати бюджет на відділі товарів для ремонту або розпочинати курний будівельний захід!
Мудрий вибір: чому варто вибрати спеціальний дерев’яний клей?
Ринок повний клеїв, але посилений дерев’яний клей, розроблений для стійкості до вологи та перепадів температур, гарантує надійний та довговічний ремонт. Він швидко сохне і не залишає слідів після висихання – ідеально підходить для щаблі, яка повинна бути красивою та функціональною в найкоротші терміни.
Економічний та ефективний трюк: заповнення та зміцнення без будівництва
Кріплення рейок: непомітна опора, яка має значення
Це, мабуть, найважливіший етап. Вам потрібно прикріпити дві рейки під ослабленим щаблем, з кожного боку. Їхня довжина повинна бути приблизно дорівнює ширині ступеня, а товщина — близько 2–3 сантиметрів кожна. Вони ефективно зміцнюють конструкцію. Просто нанесіть товсту лінію дерев’яного клею на кожну рейку, потім щільно притисніть їх під щаблем саме там, де вона прогинається або скрипить. Декілька струбцин, щоб утримати все на місці… і основа готова!
Заповнення для об’єднання, зміцнення та маскування
Після висихання клею (дайте 1-2 години для оптимального схоплювання, довше, якщо в кімнаті прохолодно), починайте фінішну обробку. Шпаклівка по дереву заповнює мікротріщини або невеликі заглиблення на поверхні ступеня. Обов’язково заповніть всі проміжки м’якою шпателем, потім розгладьте все, щоб уникнути нерівностей. Після повного висихання (ідеально почекати ніч) швидке шліфування наждачним папером дрібної зернистості забезпечить бездоганний і майже непомітний результат.
Професійні поради для ідеального фінішу
Для ще більш непомітного ефекту виберіть шпаклівку з відтінком, близьким до кольору дерева сходів, або трохи підфарбуйте її перед нанесенням. Видалення надлишків клею або шпаклівки до їх висихання запобіжить необхідності зіскребати їх пізніше. Зрештою, не пропускайте етап шліфування, щоб ідеально поєднати відремонтовану область з рештою ступеня. Ніхто не помітить слідів ремонту, крім уважного вуха… яке більше нічого не почує.
Негайні переваги: безпека, відсутність будівництва, жодних турбот!
Безпечні сходи з експрес-відновленням
Витративши лише половину дня на цю операцію, ступінь знову стає міцним. Жодного шуму. Жодного похитування. Немає необхідності бігати по магазинах будматеріалів або призначати зустрічі для важких робіт: трюк з рейками та шпаклівкою є простим і заспокійливим рішенням.
Розумне обслуговування для запобігання майбутнім проблемам
За звичкою, добре доглянуті сходи старіють набагато краще. Невелика піврічна перевірка — наприклад, під час весняного прибирання — дозволяє виявити перші ознаки неполадок та втручатися м’яко. Своєчасне зміцнення запобігає необхідності ремонту всіх сходів, що є інвестицією, ціна якої може швидко зростати… як і ціни на деревину в останні роки!
Прийнявши цей метод, який є одночасно економічним та винахідливим, кожен ступінь повертає надійність та тишу, минаючи етап «масштабних робіт». Ця техніка заспокоює. Вона подовжує термін служби сходів і дарує, як бонус, задоволення від добре виконаної роботи. Зрештою, хто б міг подумати, що проста рейка, трохи клею та трохи шпаклівки можуть творити дива? Повсякденний ремонт своїми руками іноді приховує більшу ефективність, ніж ми собі уявляємо. Сходи затихли. Ви можете знову підніматися нею. Але уважно прислухайтеся. Це тиха бавовна згори, з майданчика?