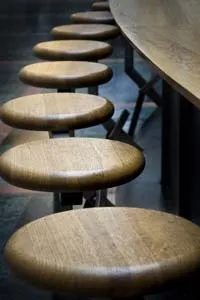
Bar stools used to live a quiet life. They are tucked away in a dimly lit basement, next to a recreation room fridge and a private home bar. They work, but they’re often ugly and invisible. Those days are over.
Now, you find them in the middle of the kitchen. Specifically, they anchor the kitchen island. This shift is more than just a trend. It is the answer to our present way of life. We cook. We eat. We work. the island is the focal point and the seats must be adapted to its height.
Don’t imagine the clunky polyester-padded monsters of the 1980s. The range today is wide. It can be made of metal, bamboo, rattan, solid wood, etc. Some have a backrest. Some are spinning. Some are starkly minimal.
This guide focuses on the simplest version: a sturdy, backless wooden bar stool. It’s a project you can finish in an afternoon. You don’t need a full workshop. All you need is basic tools and a little patience.
Collect the materials
Before you cut anything, you need to know what you’re building. The level of complexity varies depending on the design. This plan covers a simple, backless stool. The level of difficulty increases when complex carving or metal work is required. But when it comes to clean, functional products, the list of offerings is short.
Here is what you’ll need for a standard wooden build:
- Wood (the type depends on your taste and budget)
- wood glue
- Clamps (to hold the parts while the glue hardens)
- Screws (for structural integrity)
- Sliding bevel (for setting uniform angles)
Protractor (to verify angles) - A pencil
- Saw (hand saw or circular saw)
- tape measure
- Smooth (smooth edges)
- dowel rod
Sandpaper (various grits) - Stain or varnish (to protect the wood)
- Safety glasses or goggles
You will likely make more than one. Most islands can accommodate 2, 4 or more people. Buying materials in bulk saves time and ensures consistency.
Determine the appropriate height
Comfort is non-negotiable. Stools that are too high or too low can ruin your dining experience. The golden rule is simple. Leave about 9 to 13 inches (22 to 33 centimeters) of space between the seat and the platform.
Measure your island or bar height. Subtract 9-13 inches from this number. The result is the target height of the seat.
Don’t start cutting the legs yet. Measure twice. Cut once. If you do it wrong, the stool may not fit under the counter or your knees may hit the bottom of the counter. Getting this right will save you frustration later.
Why is it simple and effective?
You may be wondering why a stool without a back is recommended as a starting point. It’s all about ease. The backrest requires a more complex joint. More accurate measurements are needed. Assembly takes longer.
A simple seat and four legs? It’s very simple. You can focus on the joinery. You can focus on finishing. You can perfect the sanding.
The tools listed above are common. If you don’t own a sliding bevel, a protractor, or a plane, consider borrowing or renting one. They make work cleaner. They ensure your angles are true.
Safety instructions
Woodworking involves sharp blades and flying debris. Always wear safety glasses. Dust is invisible until it enters the lungs. Use a mask when sanding or cutting. Clamp the workpiece. Never hold it by hand while sawing.
These are not just rules. These are the habits that will keep you in the game for years.
Next steps
Here is your list. The dimensions are at hand. You know your goals. The next phase is the cut.
But before you touch wood, think about style. Do you need a rustic look? A modern, stylish silhouette? The design decisions you make here will determine the tools you use later.
There’s a strange, emerging subculture of bar-stool racers. They modified the stool with a motor, a wide base and sturdy wheels. It’s ridiculous. But for some, it’s serious business. They discussed frame geometry, braking systems and engine placement. It’s a niche hobby, but it highlights one thing: Bar stools are more than just furniture. They are objects of identity.
For you, identity can be simpler. A good place to just sit. A place to hold your coffee. A place where you can see the world from the center of your home.
Let’s get to the wood.
Avoid the Leg-Crush Factor
you have wood. We have supplies. You’ve measured the counter. I feel like I’m ready to saw.
Stop.
Your calculation is wrong.
Subtracting 12 inches from the counter height is a rookie mistake. You haven’t accounted for the seat thickness. Or the cushion. If you use thick, comfy cushion, subtract that height too. Even better is sitting on a prototype.
A stool that’s too high doesn’t just look bad. It cuts into your hamstrings. It forces you to hunch. It ruins your posture. What would happen if you chopped wood without safety glasses? Wood chips in the eye hurt way more than a sore back. Wear safety glasses. now.
How to assemble bar stool legs
Start with the legs. Cut to size. Measure twice. Cut once. Always.
Do not try to assemble all four legs at once. It’s very messy. It is unstable.
Choose a pair. Get a piece of wood that matches the width of the seat you want. Arrange the two legs and strip in a U shape. This is the leg assembly. Use wood glue. Clamp it tight.
You need two of these assemblies for one stool. There are four legs in total.
If you want to make several stools, set up an assembly line. Glue the pairs. Allow to dry. Move to the next. Make sure the room is well ventilated. Wood glue fumes are strong. Don’t breathe them in unnecessarily.
The Secret to Stability: Stretchers
When the U-leg assembly is dry, it can be attached to the seat board. But don’t stop there.
Add stretchers.
These are the horizontal bars near the bottom of the legs. They serve two purposes. They provide structural support. They give you a place to rest your feet. Dangling legs are uncomfortable. Stretchers fix that.
Here is the trick for stability: Do not glue all stretchers at once.
Attach the stretchers on two opposite sides first. Let them dry completely. This allows the wood to settle into the glue. Then measure and cut the rest of the support beams and attach them to the opposite side. This sequence prevents wobbling. It creates a tight frame.
Supplement and replacement
This is the basic structure. it works. But it’s boring.
Do you want it to look like a piece of furniture? More stain. Add clear varnish. Cut out the pattern for the legs. Adding a fabric cover to the seat adds comfort and style.
Customization and DIY
Building these from scratch is not for everyone. Measuring, cutting, gluing and attaching takes time. This requires tools.
If this seems cumbersome, consider using a custom builder. Many websites allow you to “build” a stool digitally. Choose a basic style. Choose a finish. Please select a seat shape. Choose a color. Add pillows. Choose a height.
It’s definitely not DIY. This is customization. But for people who just want to achieve a certain look without using sawdust, this is a valid method.
Where to find more information
For more information, check out the resources on DIY Web or the forums dedicated to bar stools. Websites like Extreme How To offer detailed guides. You can also find drawings on blogs like Pioneer Thinking and Ezine Articles.
The internet is full of instructions. Most start with the same advice: “Measure twice, cut once.” Wear safety glasses.


